5 Free Ways to Transfer Tidal Playlists to Apple Music

Are you a music lover who is struggling with the idea of changing streaming services? We know the battle of choosing a music streaming service is a very real one, but the more annoying task is having to re-create your entire music library on a new music platform. A major concern is the potential loss of playlists we spent time and effort creating. But don’t panic, the good news is that there are super-easy methods to transfer Tidal playlists to Apple Music. In this article, we’re going to show you 5 easy ways that will allow you to move all your playlists from Tidal to Apple Music with ease, without having to make a single playlist from scratch!
Why Transfer Tidal Playlists to Apple Music?
Switching music services is something we don’t do often. We might do it just a few times in a lifetime. There are a variety of reasons for us to want to transfer Tidal playlists to Apple Music. Whether we have a new iPhone, decided to join an Apple One bundle, or are simply interested in Apple’s user interface, there are a few reasons that some people are more likely to choose Apple Music instead of Tidal. The most common factors we usually take into consideration when making a decision are Apple Music vs Tidal sound quality. Tidal wins when it comes to HiFi and Master-quality streams, but Apple Music is also a lossless audio platform with spatial sound already built into the subscription. Apple’s sound quality is more than good enough for the vast majority of listeners, and it has some built-in features that make it easier to integrate with the rest of the Apple suite of services. Other popular reasons to choose Apple Music over Tidal and transfer playlists are:
Apple Music VS Tidal:
- Better ecosystem integration: Apple Music seamlessly integrates into iPhones, iPads, Macs, Apple Watch and even HomePod.
- Subscription perks: Apple One bundles (Apple Music, iCloud, TV+, etc.) often work out cheaper for users who want access to Apple’s other services.
- Offline access & library size: Apple Music allows large libraries and syncs up with iTunes. Offline playback is also simple.
- Friends & family sharing: Apple’s Family Sharing is more convenient for households that primarily use Apple services.
In short, Tidal is ideal for audio purists, and Apple Music offers the best overall experience for Apple device users, with solid sound quality included
How to Transfer Tidal Playlists to Apple Music with Online Tools?
A few handy online tools can make the process of moving your playlists between streaming services fast and simple. The following services are all web-based, meaning you don’t need to install anything, and you can use them to transfer playlists from both desktop and mobile. We have selected two of the most popular and user-friendly tools to help you get your playlists to Apple Music quickly and easily:
Option 1: TuneMyMusic

TuneMyMusic is a well-known and trusted playlist transfer tool recommended by Tidal itself. It’s simple, streamlined and works quickly with playlists of any size, which makes it a popular choice for users looking to move their music from one streaming service to another. Whether you want to transfer one playlist or your entire music library, TuneMyMusic has an easy step-by-step process to follow, even if you’re not super tech-savvy.
- Step 1: Go to www.tunemymusic.com/TIDAL-to-Apple-Music.php, click “Let’s Start”, and select Tidal as your source.
- Step 2: Log into your Tidal account and select the playlists you want to transfer.
- Step 3: Click “Choose Destination” and select Apple Music.
- Step 4: Confirm, and the service will begin transferring your selected playlists to your Apple Music account.
And that’s it, all the playlists you have selected from Tidal will be available on Apple Music.
Option 2: Soundiiz
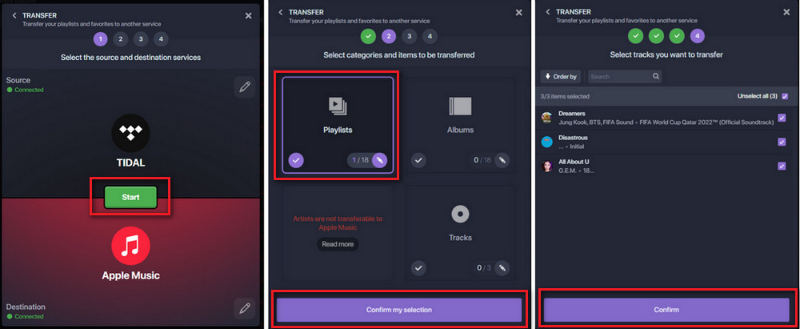
Soundiiz is another great tool built specifically for helping us manage and transfer music collections between services. Supporting not only playlists, but albums, artists and our favourite tracks as well, with a clean interface and easy-to-follow instructions, Soundiiz makes it easy to sync our Tidal and Apple Music accounts and get our music where we want it fast.
- Step 1: Visit soundiiz.com/tutorial/tidal-to-apple-music, click “Start for Free”, and connect both your Tidal and Apple Music accounts.
- Step 2: Choose the Tidal playlist you want to transfer, then follow the on-screen instructions to begin the conversion process.
- Step 3: Review your track list, confirm and let Soundiiz work its magic.
How to Transfer Tidal Playlists to Apple Music on Mobile Devices?
If you mostly stream music from your phone, you will be happy to learn that transferring Tidal playlists to Apple Music is as easy on mobile as it is on the desktop. Whether we are on iPhone or Android devices, there are apps we can use that make it a simple job to move our playlists with just a few taps. No need to manually search through our library, no complicated setup, just a quick and user-friendly experience. Here are two of the best mobile tools to get us going:
Option 1: SongShift (iOS)
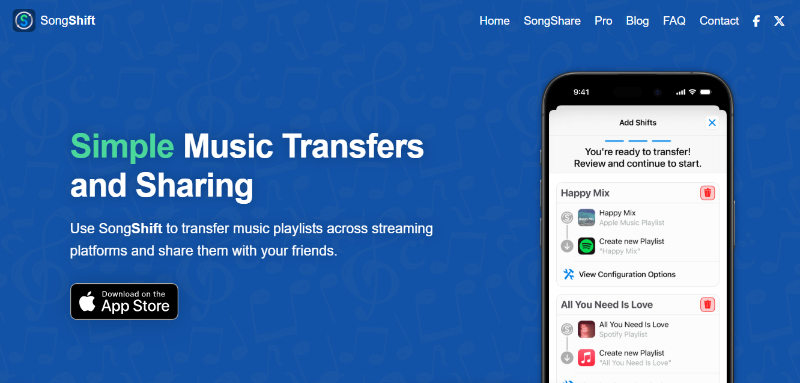
SongShift is one of the most popular apps for transferring music libraries on iPhone and iPad. With a clean, intuitive interface and support for multiple services, including Tidal and Apple Music, it makes playlist transfers incredibly smooth. SongShift does most of the work in the background, so you can keep using your device while your music moves.
- Step 1: Download SongShift from the App Store and open the app.
- Step 2: Connect both your Tidal and Apple Music accounts by logging into each within the app.
- Step 3: Select Tidal as the source and choose the playlists you want to move.
- Step 4: Set Apple Music as the destination, review the track list, and start the transfer.
Option 2: FreeYourMusic (iOS & Android)
FreeYourMusic is a reliable and well-rated app available for both iOS and Android. It’s designed specifically to help users migrate music between streaming platforms, and supports more than 20 services, including Tidal and Apple Music. Whether you’re moving a single playlist or your entire collection, FreeYourMusic makes the process fast and painless.
- Step 1: Download and install FreeYourMusic from the App Store or Google Play, then open the app.
- Step 2: Select Tidal as our source platform and log in.
- Step 3: Choose Apple Music as the destination and log in to our account.
- Step 4: Pick the playlists or albums we want to transfer from Tidal.
- Step 5: Confirm our choices and start the transfer. When it’s done, our music will appear in Apple Music, ready to play.
How to Transfer Tidal Playlists to Apple Music on PC/Mac?
If you’re using a computer and want to have more control over your files, a great way to transfer Tidal playlists to Apple Music is to download the songs with a tool like OneConv and then import them to our Apple Music library manually. This way we will have permanent access to our music, even offline, and won’t have to rely on subscription syncing or temporary access.
OneConv Apple Music Converteris a reliable all-in-one tool that allows us to download and convert media from various streaming platforms. Once we’ve saved our Tidal songs in an Apple Music-compatible format, we can easily add them to our Apple Music library by hand. It’s perfect if we want high-quality, DRM-free access to our playlists.
- Supports MP3, MP4, FLAC, WAV, and more, for both audio and video file conversion.
- Save time by quickly downloading large numbers of songs or videos without long waits.
- Download an entire playlist at a time and convert it all with one click.
- Works with all major devices like iPhones, Android phones, tablets and PCs.
Step 1 Download and install OneConv to your PC or Mac.
Step 2 Open OneConv on your PC or Mac and navigate to the “Download” module. Select MP3 or any other Apple Music-compatible format as the output.
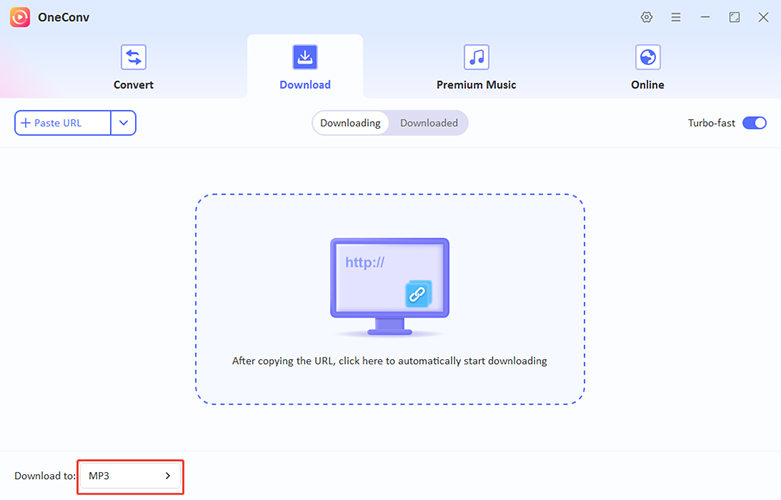
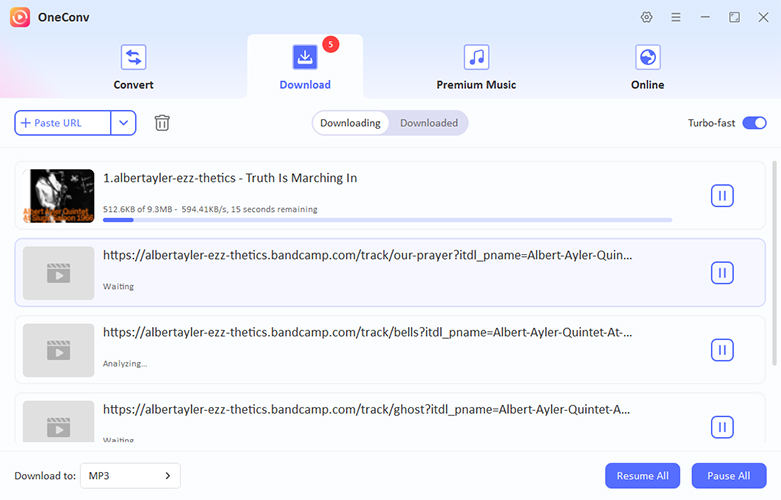
Step 3 Copy the URL of the song or playlist we want to transfer from Tidal. Return to OneConv and click “Paste URL”. Click Download to start saving the tracks.
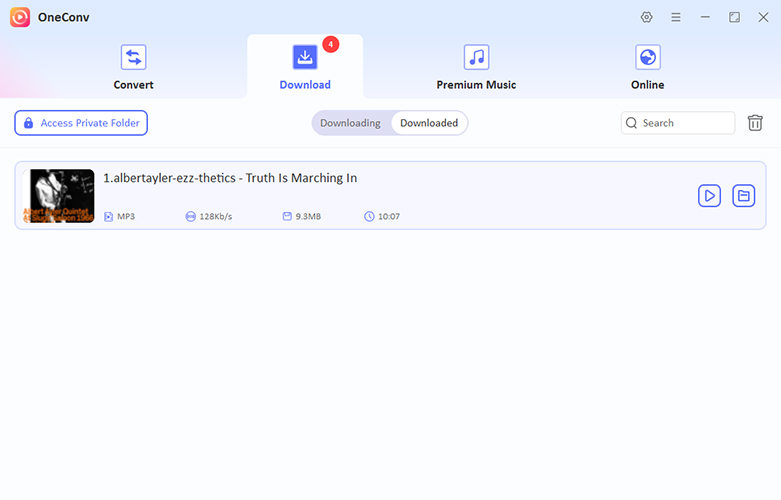
Step 4 After the download is finished, open the “Downloaded” panel to view our saved files. Make sure everything was saved correctly.
Step 5 Open Apple Music (or iTunes) on your computer, and drag and drop the downloaded MP3 files into your library. Sync to your iPhone or iPad if needed.
Final Words
Switching music platforms doesn’t mean you have to leave your playlists behind. Whether you prefer online tools, mobile apps, or desktop solutions, there are plenty of ways to transfer Tidal playlists to Apple Music without losing a beat. For the most flexible and reliable option, we recommend giving OneConv Apple Music Converter a try. It’s fast, simple, and lets you keep your music forever.