Solved: How Many Playlists Can You Have On Spotify in 2025

As one of the largest music streaming platforms, Spotify has become an essential part of daily life for countless users. As your personal music library expands, organizing your collection becomes increasingly important. One of the best ways to organize your Spotify music is through playlists, which allow you to group your tracks by mood, genre, or activity. If you’ve ever wondered how many playlists you can have on Spotify, you’ve come to the right place. Understanding how Spotify manages playlists and what factors might influence the way you organize your music can enhance your listening experience. Let’s jump into the details!
Do You Need Spotify Playlists?
Spotify playlists are essential for enhancing the listening experience, offering a personalized and organized way to enjoy music. They allow users to curate collections based on mood, genre, activity, or even specific time periods. Whether you’re creating a workout playlist, a study mix, or a collection of favorite tracks, playlists help streamline your listening process. For artists, playlists are a key tool for exposure, as appearing on popular playlists can significantly increase streams. Ultimately, Spotify playlists are not just convenient but a vital feature for music discovery, emotional connection, and overall enjoyment of the platform.
How Many Songs Can You Have on a Spotify Playlist?
On Spotify, you can add up to 10,000 songs to a single playlist, which is more than enough for most users. This generous limit allows you to build extensive playlists without worrying about running out of space. Whether you’re creating a comprehensive album collection or a playlist spanning various genres, you won’t hit the cap easily. However, while you can save up to 10,000 songs per playlist, it’s important to note that Spotify may prioritize new content over older tracks in your library if you exceed this limit. Overall, the 10,000-song limit ensures users have ample space for their music collections.
You can also download up to 10,000 Spotify tracks per device on a maximum of five devices. To keep your downloaded music available offline, you’ll need to connect to the internet at least once every 30 days. This allows Spotify to track listening data and ensure artists are fairly compensated.
How Long Can Spotify Playlists Be?
The answer for this is based on the platform’s song limit rather than duration. As discussed earlier, Spotify allows up to 10,000 songs per playlist. So, what is the longest playlist on Spotify? Simply put, the longest playlist on Spotify maxes out at 10,000 tracks. It can’t exceed this cap, regardless of duration or music genre. Whether you’re building a mix of your favorite tracks or creating a massive themed collection, just remember that 10,000 songs is the hard cap per playlist. Reaching the limit might seem unlikely, but some users actually do. One of the longest playlists on Spotify is “The Longest Playlist Ever” by Oscar Lallier, featuring 10,000 songs and over 800 hours of music. To put that in perspective, it would take more than 33 straight days to listen from start to finish.
How Many Playlists Can You Have on Spotify?
There’s no set limit. Spotify allows free users to create as many playlists as they want. This means you can organize your music by mood, genre, or any other theme without worrying about hitting a cap. While free users experience certain limitations, such as ads and shuffle-only playback, there are no restrictions on creating playlists. So, whether you’re curating a daily mix or a themed collection, you can continue building your playlists freely on Spotify’s free plan. Although Spotify doesn’t limit the number of playlists you can create, it does restrict your profile’s publicly visible playlists to 200. Any additional playlists beyond this limit won’t be visible to visitors, even if you have created many more.
Hitting Playlist Limit on Spotify! What Can You Do?
While Spotify doesn’t impose a maximum limit on the number of playlists you can create, it does restrict how many playlists you can publicly display. Eventually, you might reach this public playlist limit, making it impossible to showcase all your playlists. Additionally, managing a very large number of playlists can sometimes lead to issues, as Spotify might struggle to display them all properly. When that happens, it’s good to know your options. Here are some tips to help you manage your playlists and keep enjoying the platform.
1: Delete Unnecessary Playlists
If you’ve reached the playlist limit, a simple way to make space is by deleting playlists you no longer use. Review your collections and remove duplicates or playlists that no longer fit your listening preferences. This keeps your account tidy and frees up space for new playlists without losing your favorite songs.
2: Consolidate Playlists
Instead of keeping several similar playlists, combine them into one larger playlist. For example, if you have multiple playlists for different genres, consider creating one large genre-based playlist. This reduces the number of playlists you have, while still maintaining a comprehensive collection of your favorite music.
3: Use Folder Organization
Spotify offers playlist folders that allow you to group your playlists into categories. By creating folders for specific genres, moods, or activities, you can organize your playlists more efficiently. This helps you manage large numbers of playlists without exceeding the visual or practical limits while keeping your collections easy to navigate.

- To create folders, open the Spotify app on your computer (desktop version), as the feature is not available on mobile or web browsers.
- On the left sidebar, scroll down to the "Playlists" section, where all your created playlists are listed.
- Right-click anywhere within the Playlists section, and you’ll see an option to "Create Playlist Folder." Click on this option.
- After creating the folder, a pop-up will appear where you can name the folder. Choose a name that helps you organize your playlists by genre, mood, or activity.
- Once your folder is created, simply drag and drop your existing playlists into the folder. You can easily rearrange them by dragging them in and out of folders as you like.
How to Save Spotify Playlists to MP3?
Most of us enjoy streaming music on Spotify, but there are times when you may want to save your favorite playlists as MP3 files for offline listening or personal use. OneConv Spotify Converter is an excellent tool for converting Spotify playlists to MP3, providing a hassle-free way to enjoy music without an internet connection. With its simple interface and fast conversion speed, OneConv ensures you can easily download and keep your playlists. Let’s explore its features and how you can convert Spotify playlists to MP3.
✔ OneConv ensures the MP3 files are of high audio quality, preserving the integrity of your favorite tracks.
✔ Besides MP3, OneConv allows you to save your playlists in various formats, catering to different devices.
✔ OneConv works directly through your browser, meaning you don’t need to install any additional software.
Step 1 Visit the OneConv website and download OneConv. Follow the installation instructions to set up the software on your Mac or PC.
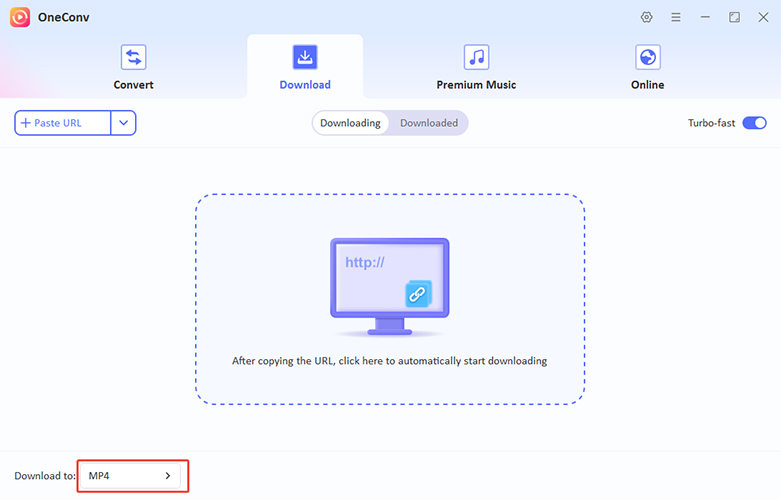
Step 2 Launch the OneConv application. From the settings menu, choose "MP3" as your desired output format for downloading Spotify playlists.
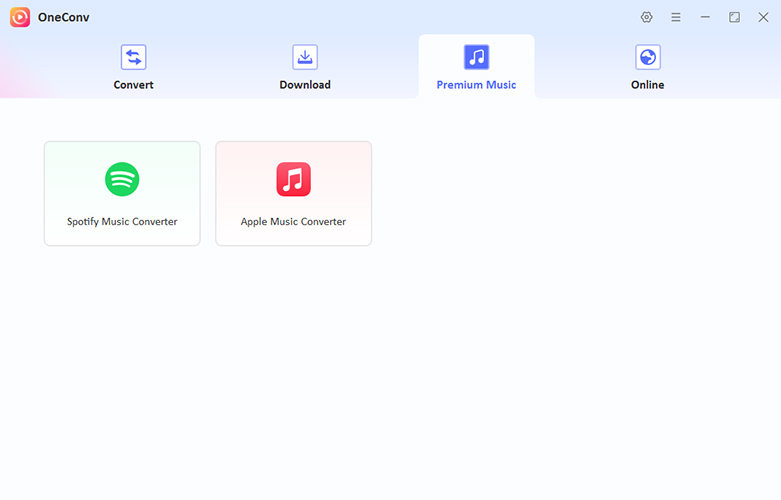
Step 3 Go to ‘Premium Music’ section and select ‘Spotify Music Converter’. Sign into your Spotify account and find the playlists you want to download.
Step 4 Hit the ‘Download’ button and wait for the playlist to be converted into MP3.
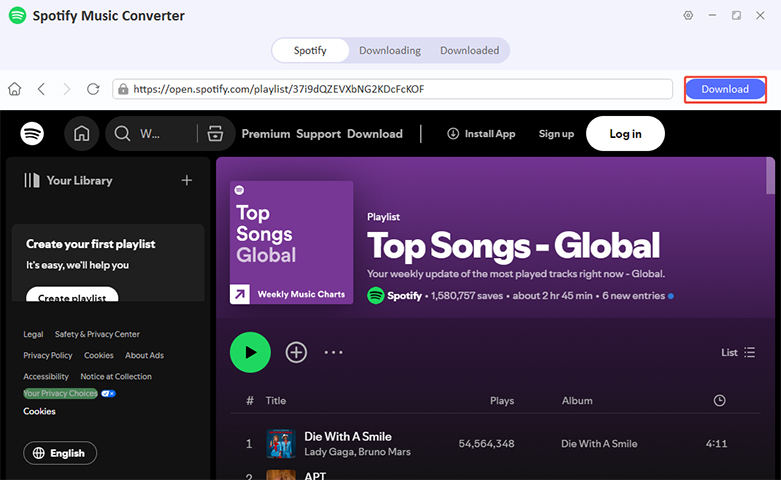
Step 5 The program will then start downloading the tracks from the playlist.
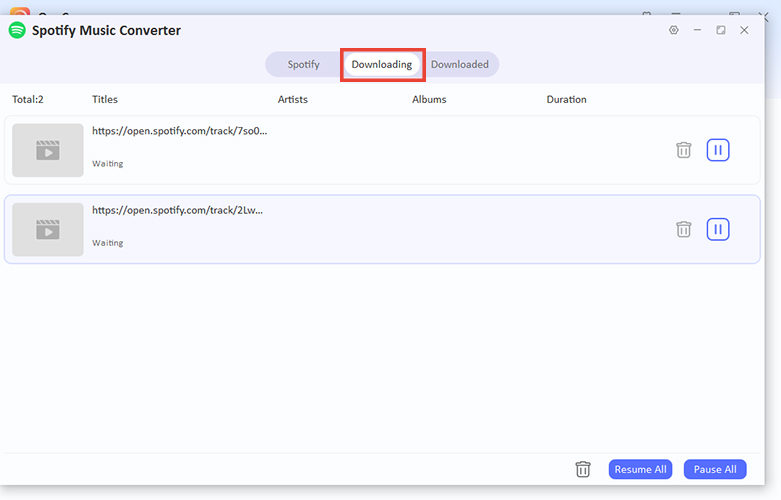
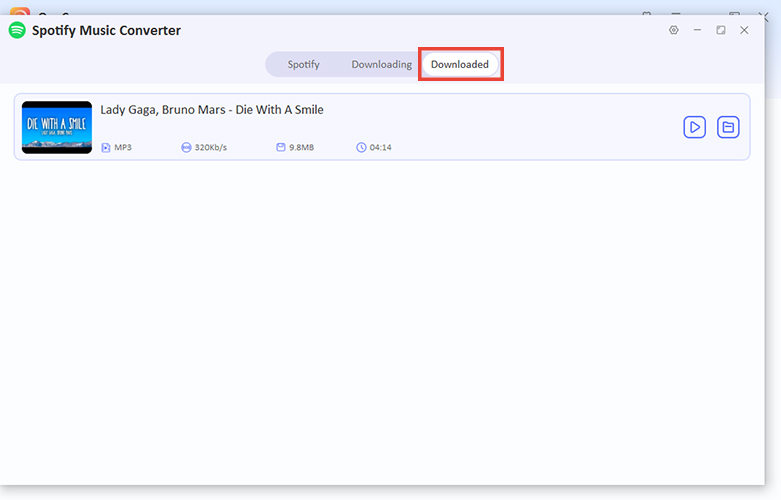
Step 6 Go to the ‘Downloaded’ tab to find all the downloaded tracks. Once finished, the files will be saved to your device.
Final Words
 In general, how many playlists can you have on Spotify isn’t a concern, as there’s no limit to the number of playlists you can create. However, if you want to save your Spotify playlists as MP3 files, OneConv Spotify Converter is the perfect tool. It’s fast, easy to use, and supports multiple formats, making it ideal for converting and downloading your favorite playlists.